OpenSpec: Spend your Tokens on Code - Not on Context
The Cost of Vibe Coding
The early era of AI-assisted development was extremely generous. Tools were cheap, context windows were being increased, and the dominant pattern was to describe roughly what you wanted and let the agent narrow it down through iteration, it even got a name - “Vibe coding”
That era looks like it is somewhat coming to an end.
As tools like GitHub Copilot, Amazon Q, and others mature and reprice toward consumption-based models, the economics of unstructured prompting stop being affordable. Every clarifying exchange, every regenerated file, every “actually, make it more like this” consumes tokens that have a real dollar value and they compound quickly, and in many cases, The sessions that burn the most spend are rarely the ones doing the hardest work - they’re the ones spending the first half of their token budget establishing what should have been written down before the agent was ever invoked.
These changes aren’t a retreat from AI tooling, but it does drive some changes with how you work with it. If you’re going to spend tokens, spend them on focused execution.
What is OpenSpec?
OpenSpec is an open standard for writing machine-readable specifications that describe the desired outcome of a development task. Rather than capturing steps or instructions, a spec captures intent: what to build, the constraints it must satisfy, the inputs and outputs it should expose, and how correctness is validated.
The spec lives as a set of structured documents, checked into version control alongside the code it describes. It isn’t a prompt stored in a chat window or a comment block buried in a README - it’s a first-class artifact in the repository, as reviewable and diffable as the code it governs.
Any compliant agent can consume a spec and execute against it, so it isn’t tied to a particular tool or vendor - it’s designed to be the shared language between your objective and whatever agent happens to be executing it today.
Why Open Standards Over Vendor Frameworks?
Microsoft has SpecKit, which integrates cleanly into Copilot’s workflow. AWS has Kiro, which brings a similar structured spec approach into its agent ecosystem. Both are capable tools and worth checking out, and it’s worth noting that with some effort, their spec formats can be made to work across other agents too.
That said, my preference is to align to open standards from the start rather than adapt proprietary backed formats after the fact. It’s the same reason I like portable Skill formats as I talked about in an earlier post on the Strands SDK. When intent is codified in an open format, it’s immediately usable by any capable agent without translation or adaptation work. The spec is the descriptive artifact; the agent is just the execution layer at a point in time.
OpenSpec takes that position explicitly. Because the format is open and agent-agnostic, the same spec runs on OpenCode, Copilot, Kiro, Claude Code, or any other compliant agent without modification. As agent costs and capabilities evolve over time, portability becomes a meaningful outcome and financial lever. You ideally want to be in a position in which you can shift execution to the cheapest capable agent without rewriting your intent, and without the friction of adapting a format that was designed for a different tool’s workflow.
In the next sections, we’ll run through the process of configuring and executing AI Agents using OpenSpec to build a terraform module for AWS RDS Postgresql, it assumes you have installed the software as per the instructions on their website.
Getting Started with the Project: config.yaml
Before writing a task-level spec, OpenSpec expects a config.yaml at the project root. This acts as the standards layer, defining the project’s domain, tech stack, architectural patterns, naming conventions, and validation requirements so that context doesn’t need to be re-established in every spec. It effectively gives any incoming agent a complete understanding of how the project operates from the outset. The example here comes from a cloud billing platform hosted on AWS, using a Composite/Component Terraform pattern with GitOps delivery via ArgoCD.
From there, the config defines how work is done. Architectural rules - like avoiding generic this resource names, requiring components to receive explicit inputs instead of performing their own lookups, and handling AWS naming limits - are made explicit rather than left as tribal knowledge. Validation is equally fixed, with terraform fmt, validate, test, plus Checkov and shellcheck defining what “good” looks like. It also clearly defines what the project does not own, such as shared infrastructure like VPCs, subnets, KMS, and logging buckets, preventing agents from recreating them and catching violations during validation.
schema: spec-driven

context: |

  Domain: Cloud Billing Platform — AWS deployment using a Composite/Component
  Terraform pattern and GitOps.

  Tech Stack:
    - Cloud: AWS
    - Infrastructure: Terraform, RDS, EFS, EKS
    - Orchestration: Kubernetes, Helm, ArgoCD
    - Languages: Bash, Python, GitHub Actions

  Architectural Patterns:
    - Pattern: Terraform Composite and Component module pattern.
    - Data Lookups: ALL data lookups must be performed in Composite (parent) modules.
    - Variable Passing: Component (child) modules must receive values as explicit input
      variables. Component modules MUST NOT contain data source lookups.
    - Platform Dependencies: Networking (VPC/Subnets), KMS keys, and S3 logging buckets
      are platform-provided. Do not recreate.
    - Resource Labels: Terraform resource labels MUST be descriptive of the resource's
      function or technology. The generic label `this` MUST NOT be used. Use lowercase
      identifiers that reflect what the resource is (e.g., `postgresql`, `subnet_group`,
      `ingress_sg`). This applies to all new and modified resources across all modules.

  Environment & Security:
    - Support: All modules must handle Non-Production and Production logic.
    - Features: Support configurable settings for observability, logging, and security
      (encryption at rest/transit, IAM roles).

  Naming Taxonomy (Least to Most Specific):
    Pattern: <appname><delimiter><component_name><delimiter><environment><delimiter><identifier>

    | Parameter      | Description                                      | Examples           |
    |----------------|--------------------------------------------------|--------------------|
    | appname        | Application alias                                | sqd, guac          |
    | component_name | Cloud component alias                            | db, asg, bknd      |
    | environment    | Service tier                                     | uat, dev, prd, tst |
    | identifier     | Unique build ID (e.g., CF_BRANCH / CF_BUILD_ID)  | feat-123, bld-99   |

    Rules:
    - Delimiters: Use [- _ . /] based on AWS service limits.
    - Resource Naming: Avoid resource class suffixes (e.g., do NOT use '-sg' or '-role').
    - Edge Cases: Truncate names for length-limited services (e.g., ELB 32-char limit)
      using: substring(0, length(name) > 32 ? 32 : length(name)).
    - Tagging: Always apply full, untruncated tags even if the resource name is truncated.

  Testing & Validation Standards:
    - Documentation: Comprehensive README.md required at the root and within every module.
    - Infrastructure: `terraform fmt`, `terraform validate`, and `terraform test`
      (all tests must pass).
    - Security: Checkov for static analysis.
    - Data/Scripting: `jq` (JSON), `yq` (YAML), and `shellcheck` for all Bash scripts.

  Deployment Pattern:
    - Strategy: GitOps via ArgoCD and Helm.
    - Automation: Bash/Python for CI/CD utility scripting.
Setting Up OpenSpec and Creating a Spec
This walkthrough starts from a greenfield module - a clean repository, no existing Terraform code. That’s the simplest case and the cleanest way to see what OpenSpec produces end to end.
It’s worth noting that OpenSpec isn’t limited to greenfield work. You can write specs against existing codebases to define what must not change, validate that a refactor preserves expected behaviour, or extend a brownfield module with new capability while keeping existing outputs stable.
Initialising the Repository
First, we create and initialise the repository:
mkdir billing-postgresql
cd billing-postgresql
git init
Then run openspec init to scaffold the project and register the agents you want to use. OpenSpec supports 28 agents at the time of writing. For this walkthrough I’m setting up three: Claude Code, Gemini CLI, and OpenCode.
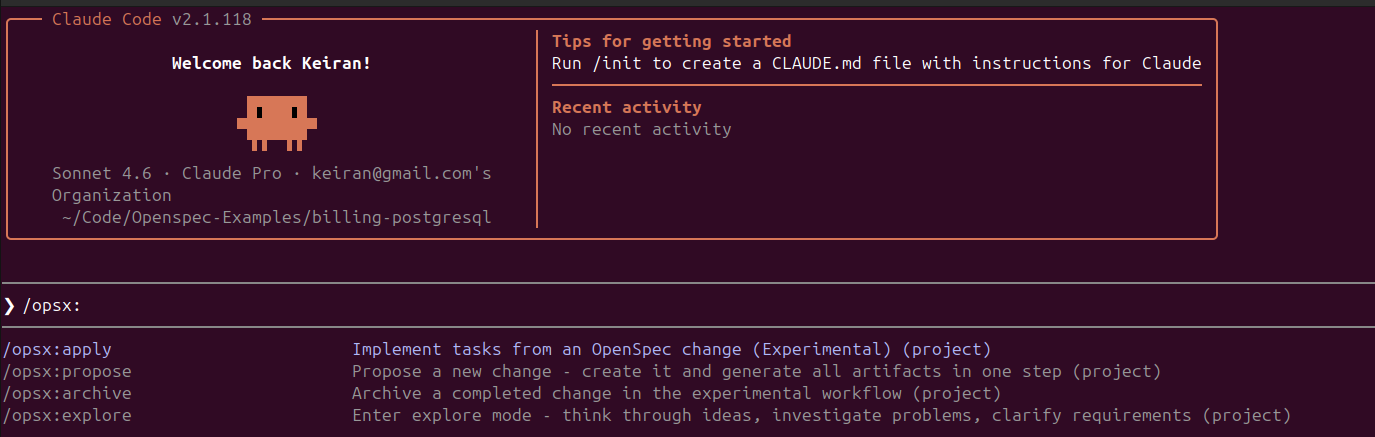
Once the init completes and you open Claude Code in the repository, the /opsx commands are immediately available as native slash commands - no additional configuration needed.
Once init completes, the repository structure looks like this:
.
├── .claude
│   ├── commands
│   │   └── opsx
│   │       ├── apply.md
│   │       ├── archive.md
│   │       ├── explore.md
│   │       └── propose.md
│   └── skills
│       ├── openspec-apply-change/SKILL.md
│       ├── openspec-archive-change/SKILL.md
│       ├── openspec-explore/SKILL.md
│       └── openspec-propose/SKILL.md
├── .gemini
│   └── commands/opsx/ ...
│   └── skills/ ...
├── .opencode
│   └── commands/ ...
│   └── skills/ ...
└── openspec
    ├── changes
    │   └── archive
    ├── config.yaml
    └── specs
Each agent we chose to configure gets its own configuration directory containing the same four OpenSpec skills / commands - propose, apply, explore, and archive in a format that the specific agent understands. The openspec/ directory is agent-agnostic and shared across all of them - one source of truth for the project’s config and specs, regardless of which agent is executing.
Adding the config.yaml
With the repository scaffolded, the next step is populating openspec/config.yaml before writing any specs. In this case, I’m using the file I created in the section above.
Proposing a Spec with Claude Code
With the config in place, I open Claude Code in the repository and use /opsx:propose to describe the feature you want to build. The command opens an interactive prompt to categorise the type of change:
Select New feature and describe what you want:
/opsx:propose

I want to create terraform code for AWS PostgreSQL suitable for running
Non-Production and Production workloads. I want to ensure it is unit tested
using the Terraform unit testing framework and documented with examples for
a variety of use cases.
When this is executed, Claude reads the config.yaml, understands the Composite/Component pattern, the naming taxonomy, the testing requirements, and the platform dependency constraints - and produces a full set of change artifacts.
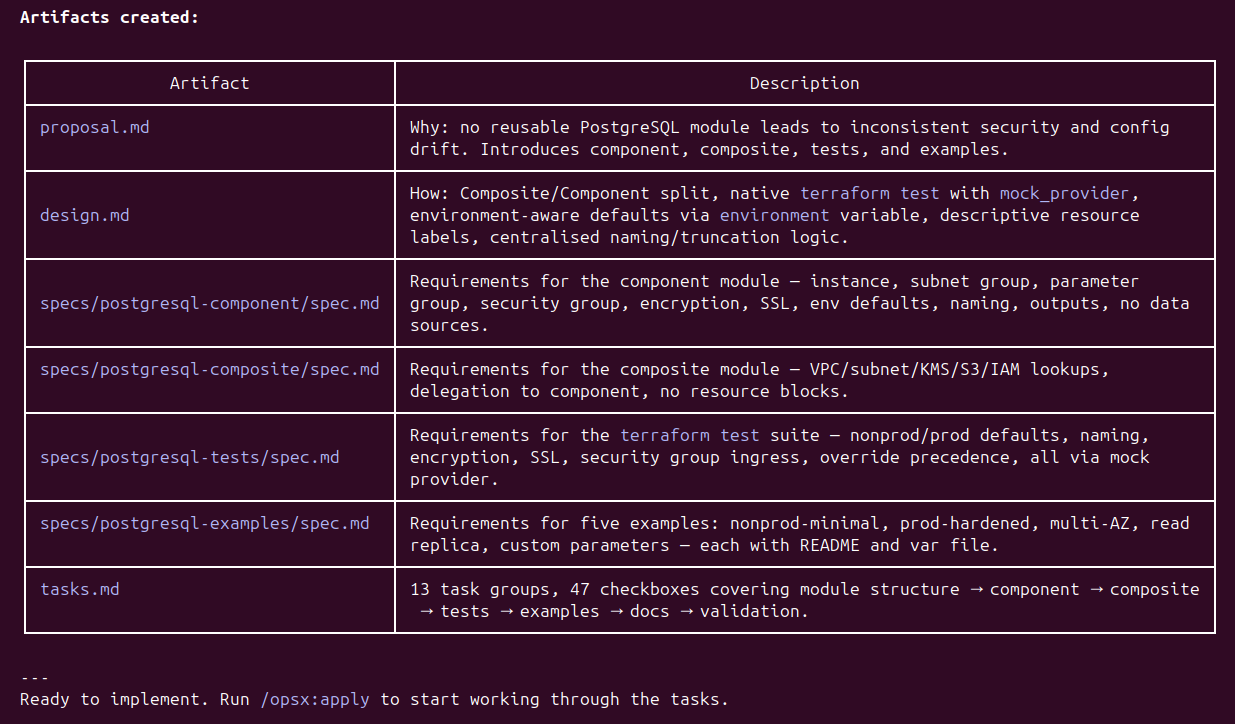
At this stage, the agent hasn’t written a line of code as yet. It has produced a proposal.md explaining the business case, a design.md capturing the architectural approach, four granular spec.md files covering the component module, composite module, test suite, and examples respectively, and a tasks.md breaking the work into 47 discrete checkboxes across 13 task groups. The repository now looks like this:
└── openspec
    ├── changes
    │   └── aws-postgresql-terraform-module
    │       ├── design.md
    │       ├── .openspec.yaml
    │       ├── proposal.md
    │       ├── specs
    │       │   ├── postgresql-component/spec.md
    │       │   ├── postgresql-composite/spec.md
    │       │   ├── postgresql-examples/spec.md
    │       │   └── postgresql-tests/spec.md
    │       └── tasks.md
    ├── config.yaml
    └── specs
Each spec.md is worth reading before running apply. They’re readable documents - structured requirements that a human can review and challenge in a pull request. More importantly, they carry forward the constraints from the config.yaml directly. For example, the naming convention requirement in the component spec reads:
### Requirement: Naming Convention Compliance

All resources created by the component module SHALL follow the platform naming
taxonomy <appname>-<component>-<environment>-<identifier>. Resource names SHALL
be computed from input variables app_name, component_name, environment, and
identifier. Names exceeding AWS service character limits SHALL be truncated using
substr at the limit boundary. Tags SHALL always use the full untruncated name.

#### Scenario: Name prefix constructed correctly
- WHEN app_name = "sqd", component_name = "db", environment = "prd",
  identifier = "feat-123" are provided
- THEN the computed name prefix is sqd-db-prd-feat-123
As we can see the config.yaml’s naming taxonomy has been read, understood, and translated into a testable requirement with a concrete scenario. The project context flows into the spec, and the spec constrains what the agent produces when it executes.
Applying the Spec
With the specs reviewed and the tasks defined, /opsx:apply hands control back to the agent to work through the task list. The agent reads the config.yaml, the individual spec.md files, and tasks.md in sequence, producing the module code as it works through each task group.
After 15 minutes and 41 seconds, Claude Code reports 61/61 tasks complete:
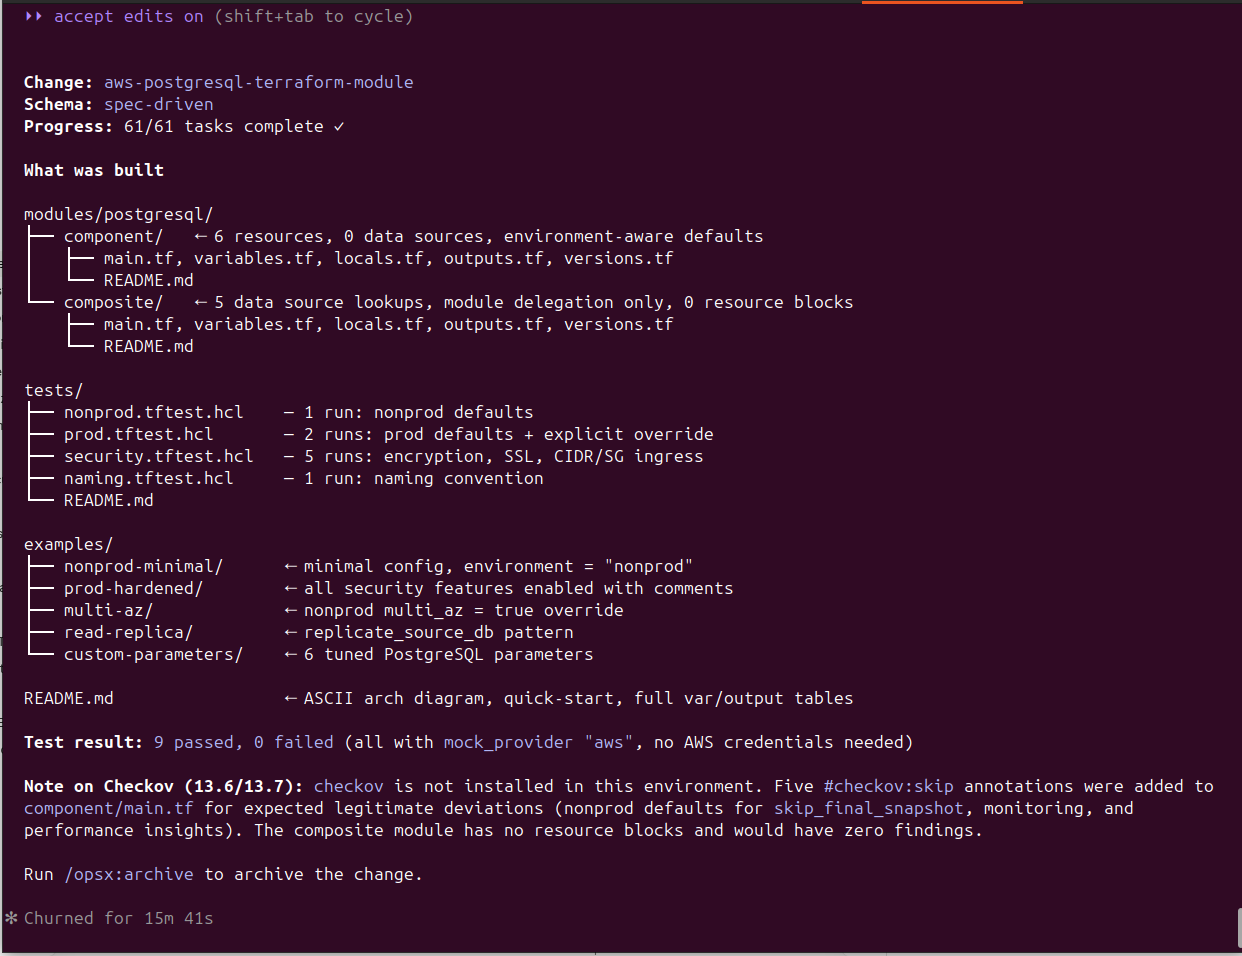
As we can see, the code was written to the specification, and it is ready for the next round of reviews, adjustments or other changes.
Archiving your specification
In this example, we’ll assume this code is suitable to move onto the next step in the OpenSpec workflow, archiving.
By running /opsx:archive this marks the feature specification as complete and closes out the change, syncs the four capability specs to openspec/specs/ for future reuse, and timestamps the archive:
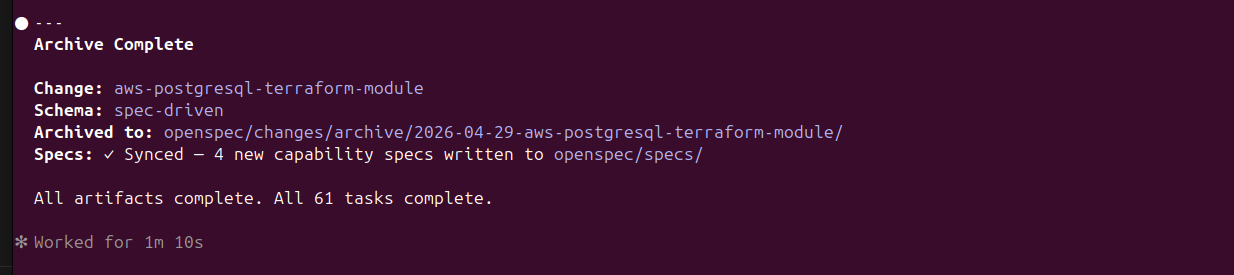
This part of the development process is worth paying attention to. The generated specs for our feature don’t just sit in openspec/changes/ as a record of what was built - they’re promoted into openspec/specs/ as reusable capability definitions. The next time a feature touches PostgreSQL, the agents have a prior spec to reference, extend, or validate against rather than starting from first principles.
├── openspec
│   ├── changes
│   │   └── archive
│   │       └── 2026-04-29-aws-postgresql-terraform-module
│   │           ├── design.md
│   │           ├── .openspec.yaml
│   │           ├── proposal.md
│   │           ├── specs
│   │           │   ├── postgresql-component
│   │           │   │   └── spec.md
│   │           │   ├── postgresql-composite
│   │           │   │   └── spec.md
│   │           │   ├── postgresql-examples
│   │           │   │   └── spec.md
│   │           │   └── postgresql-tests
│   │           │       └── spec.md
│   │           └── tasks.md
│   ├── config.yaml
│   └── specs
│       ├── postgresql-component
│       │   └── spec.md
│       ├── postgresql-composite
│       │   └── spec.md
│       ├── postgresql-examples
│       │   └── spec.md
│       └── postgresql-tests
│           └── spec.md
Another key benefit of this approach is that the specs become living documentation. New team members can read the spec and understand the intent of the module without reading the Terraform. The constraints that matter are explicit and findable, not implicit in the code or buried in a wiki page that’s six months out of date. When the module changes, the spec changes alongside it in the same pull request.
And when you need to switch agents - maybe because Copilot repriced, or maybe because OpenCode’s new model handles Terraform generation more reliably - you hand the spec to the current agent of choice and it executes. No need to re-explain the constraints. The intent is already written down, in a format that belongs to your repository, not to a specific vendor’s tool.
One Spec Format, Three Agents
Building on OpenSpec’s portability, I ran identical feature prompts through three different tools. While the prompts were the same, both the generated OpenSpec artifacts and the final code outputs differed - including during the apply phase. These variations aren’t due to the spec format, but to the models behind each agent.
That’s the key point: OpenSpec is consistent, but model capability isn’t. Different models produce different levels of accuracy, constraint adherence, and test quality. The spec defines the structure and rules, while the model determines how well they’re executed.
This ultimately enables a deliberate trade-off between cost and quality - the spec stays the same, but the execution layer can vary depending on the task.
The link to the repo below shows the OpenSpec code and specs generated by these other AI tools and models if you are interested to look at it in a little more depth.
A Note on Scope: Single Repository
This walkthrough is intentionally scoped to a single repository. That’s where OpenSpec’s patterns are most mature and where the execution loop is clearest.
In practice, platform-level features rarely fit neatly into one repo. A realistic version of “add PostgreSQL capability” might span three codebases: the module repo where this Terraform lives, a network repo where RDS subnet groups are managed and need to be enabled, and a platform IAM repo where RDS actions need to be enabled across account roles and SCPs. Cross-repository spec coordination - where a single feature fans out to multiple execution contexts - is an area the community is actively working through. Patterns exist, but they’re still emerging and not yet standardised enough to recommend a single approach.
Before You Apply: Using /opsx:explore
In the walkthrough above, I accepted the proposal as is, and ran /opsx:apply directly. That’s fine for a demonstration, but in real delivery you’ll often want a step in between - a chance to interrogate the spec before tokens are spent building to it.
That’s where /opsx:explore comes in. Rather than executing, it puts the agent into a thinking-partner mode: reviewing the spec with you, surfacing assumptions that haven’t been made explicit, challenging design decisions, and helping you work through anything you’re not yet certain about. It’s the spec equivalent of a design review - the moment to ask questions before they become expensive rework.
Some practical examples of when to use it:
- You’ve described a feature at a high level and want the agent to identify gaps or ambiguities in the spec before committing to a task list
- You want to challenge whether the Composite/Component split makes sense for this particular feature, or whether a simpler structure would serve better
- You want the agent to flag any conflicts between what you’ve asked for and what the
config.yamlsays is standard - before those conflicts surface mid-build as unexpected decisions
The interaction is conversational. You’re not running a build - you’re reviewing intent. When you’re satisfied that the spec reflects what you actually want to build, you close explore mode and move to /opsx:apply with confidence.
Preparing the Agent Runtime
Before handing a spec to an agent, and the cost of tokens is on the rise, the runtime environment that contains all the tools, libraries, utilities and access to code is extremely important. An observant reader will notice in the apply phase above that Checkov wasn’t actually installed on the machine doing the work. Instead of validating, the agent added #checkov:skip annotations for expected deviations - a workaround, not the ideal outcome. This is a concrete example of why AI runtime completeness matters.
Every token spent investigating and installing tools or resolving missing dependencies is wasted effort. At scale, across multiple agents, that overhead becomes real cost. The fix is straightforward: the runtime of the AI Agent should arrive fully equipped. Everything declared in config.yaml — Terraform, Checkov, shellcheck, and supporting tools - should already be installed, versioned, and on the path.
This is exactly why I advocate for decoupling AI development activities from end user devices using an agent task platform, orchestrator, or what’s increasingly called an “agent harness.” (I like the solution from coder.com personally). These systems handle provisioning, launching, and lifecycle management of standardised agent runtimes, ensuring each environment is preloaded with the required tools, configuration, credentials, and access to code. The result is agents that are ready to execute immediately - focused on the task itself, not burning tokens on setup, missing software, or environment drift.
Whether via a harness or a well-defined containerised setup, the principle is the same: the agent should use the toolchain, not build it. The config.yaml defines what’s required; the runtime should guarantee it’s there.
Closing thoughts
This post just scratches the surface of what spec-based development is, how to use it, and some of the benefits it unlocks.
I feel that it’s one of the foundational disciplines that will make AI-assisted work economically sustainable as the subsidised era fades. Tokens are finite; they should be spent on execution, not rediscovering intent or reworking inconsistent outputs.
Define what you want and what “good” looks like upfront. The clearer the spec, the more efficiently your agent of choice can deliver against it.
This post was written with assistance from AI, and I’ve worked to ensure all examples, configurations, and recommendations are technically accurate as of the time of writing.